
Coaching soccer to kids is incredibly rewarding but also hard work! Creating a training session with drills ideal for the team’s age and ability can be daunting.
To make life a little easier for you, I’ve compiled a list of soccer drills for kids that will cover all the main areas of soccer that youth players should focus on.
Soccer should be fun for them at this stage, so we need to ensure every drill is fun.
Remember, we’re dealing with kids here. The more enjoyable it is for the player the more effort they’ll put into training and the longer they’ll play the game.

The List of Soccer Drills For Kids
Implementing these drills in youth soccer training sessions should help players improve their skills and abilities.
These drills will give players the solid foundation they need to go on and develop into even better players.
The best soccer drills for kids are:
- The “PAC Man” drill
- The “Gated Passing” drill
- The “Ouch” drill
- Duck Tails
- Fill and Empty the Basket
- Shark and Minnows
- The “5 Goals” drill
- Simon Says
- and “Dribble-sprint-Dribble“
(Click on one of the above links to jump straight to a step-by-step guide to each drill.)
Next, I’ll explain how to lay out each drill and what equipment you’ll need, and then I’ll take you through each drill step-by-step.
If, after reading this, you want more helpful tips on training youth, I recommend you check out my post – How to coach Youth Soccer.
How Each Kid’s Soccer Drill Is Laid Out
To help you understand how each drill works, I’ve compiled a step-by-step process for setting up and running the drill.
Each section also has an image or video displaying how the drill works.
Take the time to go through these drills, understand what they are asking the kids to do, and get out there and start using them in training sessions.
You’ll be amazed at how much your youth team will improve.
Equipment Needed for the Drills
Just before we look at the drills, you will notice that you need two pieces of equipment for most of them:
- A soccer ball and cones.
Getting hold of good-quality soccer balls is much better than settling for poor ones. The lower-quality ones are usually less comfortable for kicking and need replacing more often.

I recommend the Adidas Capitano soccer ball as it’s a great ball for youth and looks fantastic as well!
You can check it out on Amazon here.
Also, consider checking out these cones on Amazon. There are a lot of poor-quality cones out there, but these should last a long time.
Now, let’s get on with what you’re here for…Nine of the best soccer drills for kids!
1. The “PAC Man” Drill
First things first, warmup drills are crucial for players of any age as they prevent injuries and help you enjoy the beautiful game longer.
So I’ll start with a fantastic warmup drill named ‘Pac Man.’
It’s based on the classic arcade game, and hopefully, you’ll understand why once I describe it.
Remember, this is a warmup drill, so it shouldn’t be intense.
The kids will get into a rhythm while having fun. This will also help them prepare for the training drills ahead.
Requirements:
- You will need a marked section on a field that the youth players shouldn’t leave during the drill.
- You will need multiple soccer balls, depending on the number of kids playing.
Step-By-Step Walkthrough of the Drill:

Step 1: Set-up
Two players start with the ball on the edge of the grid. All other players start inside the grid.
You can call the players with the balls the “Pac men.”
Step 2: – The aim of the game
The “Pac men” try to hit the other kids with the ball below their knees.
The other kids aim to prevent themselves from being hit with the ball by moving around inside the marked area.
Step 3: More players become “PAC Men”
When a ball makes contact with a player, they also become a Pac man. Then they collect a ball from outside the area and join in.
As the number of Pac Men increases on the field, the drill becomes challenging and more fun, and the last kid without the ball wins the drill.
This drill is similar to the Rondo, a fun practice you’ll often see in the training videos of top clubs.
You can involve as many or as few kids as you like in this drill. Just vary the size of the area depending on the number of players involved.
Key Takeaways:
There are several takeaways from this drill:
- It warms up the players.
- It provides practice in hitting the target,
- Improves ball trickery and faking passes
- It improves decision-making,
- sharpens a player’s movement,
- and hones your kid’s instincts
But its primary goal is still the same: to use aerobic activity to get the youth players into a rhythm for the remainder of the training session.
Make sure not to make it intense.
There is no need to conduct multiple rounds of the ‘Pac-Man’ drill. You’re only using it as a warmup exercise.
2. The “Gated Passing” Drill
The gated passing drill is another excellent drill for the warmup as part of the training session and a great soccer passing drill for kids.
It’s perfect for developing short passing and ball-receiving skills as it improves pass accuracy and allows players to enhance their ball control with their first touch.
This is especially important for youth.
Requirements:
- You will need a section of a field at least 10 yards wide.
- You will need one soccer ball for every two kids involved in the drill.
Step-By-Step Walkthrough of the Drill:

Step 1: Drill set-up
Set two cones about 1 yard apart to form a “gate.”
Put another set of cones on the ground about 5 yards from the first two. (refer to the image above for clarity)
Step 2: Player position
Position players behind each set of cones so that two players are facing each other
Step 3: Pass the ball
Players pass the ball back and forth, trying to send each pass right through the center of the gate in front of them.
It is essential to let the ball pass through the gate each time.
You can choose whether you allow the players to perform the drill with one or two touches of the ball. But, again, consider the players’ ability when you make this decision.
Additional instructions and key takeaways:
- The player should constantly be on their toes without the ball, transferring weight from one foot to another. This constant movement improves players’ agility and helps them stay focused and prepared to receive the ball.
- A player can receive the ball with the sole or inner part of their cleats. If performed with the sole area, they should try to keep their leg straight and stop the ball with the tip of the shoe. If performed with the inner part, the player should position the receiving foot slightly above the ground.
- The player should position the receiving foot close to the ball. If the standing leg is a bit far from the ball, it can affect the passing accuracy and put them off balance.
- Body balance is critical. Encourage the kids to keep their bodies straight when passing. Leaning back with your torso during passing can lift the ball and reduce the precision of the pass.
- Players should always try to keep their heads up and follow the position of their passing partner. Developing this habit from an early age is vital for players’ later development. It improves the player’s positioning and area awareness.
This is also a great option to add to the list of the best soccer drills for high school if you spend any time working with high school-age soccer players.
If you are looking for a guide on passing a soccer ball, check out my post explaining how to pass a soccer ball successfully every time. It even includes tips and techniques for every type of pass.
3. The “OUCH” Drill
Soccer drills for kids should cover all the essential areas of the game.
We discussed warmup drills, so now let’s talk about a drill that will help kids improve their aim and shooting. Ensuring they are having loads of fun along the way, of course!
This drill is named ‘Ouch!’. Sounds exciting, right?
There’s a reason behind this unusual name. In this drill, the aim for the kids is to hit the coach with the ball!
Every time the ball hits the coach, the coach has to yell, ‘Ouch!’. This creates an element of enjoyment for the kids participating.
It also works really well with young kids and I included it in my list of the 8 Best Soccer Drills For Kindergarten Kids.
Requirements:
There isn’t much equipment required except a few balls.
But here are a few things that you should keep in mind while practicing this drill:
- Every kid involved should have a ball.
- Define the grid area according to the age of the kids involved. If they are under 5, opt for a smaller space. Similarly, if they’re a bit older, you can increase the area to make it challenging for them.
- The coach must not make it difficult for the kids to hit them by moving too fast, as it will kill the enjoyment. While playing with under 5s or 8s, let them hit you regularly to make the kids feel accomplished. This should increase their engagement.
Step-By-Step Walkthrough of the Drill:

Step 1: Define the area
First and foremost, you need to define the grid area, either in rectangular or circular form. The coach can choose based on what works best in the environment the drill is being used.
Step 2: Start the drill
Next, give each kid their own ball in the grid.
The coach or designated player should start jogging around within the marked area between the players. Once the coach shouts “begin,” the kids try and kick the ball toward the coach to hit them below the knee.
Step 3: Collect points
Each time a kid hits the target man, they get one point, and the player with the most points at the end of a given time steals the show!
There are no hard and fast rules for this exciting drill, but make sure the target and the players never go outside the defined areas.
Key Takeaways:
Now you know the drill, let’s talk about how it will improve your kid’s game.
As you can see, this drill deals with shooting and controlling the ball while on the run.
Using this drill will significantly enhance your kid’s ability to improvise and hit their target in different situations.
That may be when passing to a teammate or hitting the back of the goal net. It will surely help them in their future soccer journey.
4. “Duck Tails” Drill
“Duck Tails” is another drill that kids love to play.
It involves players running around within a defined area, trying to take the “tail” from one of their opponents—all the while keeping control of the ball at your feet.
If you’ve ever played flag football, you will understand the challenge of grabbing something from another player while they are running past you at full speed.
But that’s also what makes this so enjoyable for kids!
Requirements:
- Set up an area of approximately 20 yards x 20 yards. You can vary the size depending on how many players are involved.
- Each player needs a soccer ball.
- Each player will need a “tail.” This can be a pinny, a jersey, or any other piece of material you have available.
Step-By-Step Walkthrough of the Drill:

Step 1: Set up the area and players
Use cones to set up a square around 20 yards x 20 yards. All the players start within this box and cannot leave.
Each player begins with a ball at their feet and a “tail” in the back of their shorts. Ensure the “tail” is out far enough that others can grab it!
Step 2: Start the drill.
At the coach’s command, the players start dribbling their ball around the box while trying to take a “tail” from an opponent.
Each player must keep the ball close to them and always under control.
Step 3: Players are out
When players lose their “tail,” or their ball leaves the box, they are out and must step out of the drill. Players shouldn’t try to tackle other players and must concentrate on their own ball.
Step 4: Time and winner
Play this drill in short bursts. One minute at a time should be enough.
At the end of the time, the players still in the game are the winners. However, you can add an extra level of competitiveness by declaring the player with the most “tails” the overall winner.
Key Takeaways
Duck Tails is an excellent drill for improving youth players’ ball control under pressure.
Not only do they have to focus on what they are doing with the ball, but they have to be aware of what is happening around them.
They could be out of the game if they lose focus for just a few seconds!
5. Fill and Empty the Basket
Kids love to run, but it becomes highly engaging and exciting for them when you add a spice of competition to it.
So I have a drill just like that!
Fill and empty the bucket is essentially a set of two drills that focus on your kid’s dribbling and ball control skills when under pressure.
It’s a simple, efficient, and fun way to help young people develop the necessary ball skills. This drill is excellent for U6, up to U10 age-level players, and I’ve included similar drills in my list of soccer drills for 10-year-olds.
Let’s go through this drill briefly so you can know how this works!
For more ball control drills, check out my 10 Soccer Ball Control and Footwork Drills (For All Ages).
Requirements:
You’re going to need the following few essentials:
- You will need to define a rectangular area, keeping its size relevant to the age group of kids participating.
- You’ll need multiple cones to create a basket in that area.
- One ball per player is required to execute this drill effectively.
Step-By-Step Walkthrough of the Drill:

As we mentioned earlier, it’s basically a set of two drills. So let’s formulate a guide for each first!
The first step is to fill the basket.
Split the youth players into two teams, with a minimum of four players on each team. Give each player a ball.
Ask half the team to stand on one side of the rectangle and the others on the opposite side.
The task is to dribble these balls from the edge of the area and drop them off in the basket as fast as possible.
Whichever team fills the basket first wins the drill.
Here’s the second part.
The participants then have to empty the basket. It’s essentially the complete opposite of “Filling the basket.”
Once the teams have filled the baskets, both teams have to empty the marked basket and take the balls back home, which was the starting point in the first place.
The team that empties their basket fastest is the ultimate winner.
Step 1 – Set up the drill.
You will need to set up two small squares using a cone for each corner approximately 10 yards from each other. The box should be big enough to contain four soccer balls.
15 yards from with side of the boxes, mark the player’s starting point.
Step 2 – Position of the players
Split eight players into two teams of four. Have two players stand at each starting point.
Each player starts with a ball at their feet.
Step 3 – Dribble the ball.
One player from each team begins by dribbling the ball from the starting mark toward the box in the center. They then leave the ball in the central box and sprint to the starting mark at the opposite end of the area.
When they get to their teammates, the next player begins dribbling the ball back toward the box in the center.
Step 4 – Collect the ball.
Once all the balls are in the central box, the players perform the drill in reverse.
One player sprints to the box containing the soccer balls and dribbles the ball back to the starting point, whereas the next player sprints to the box and dribbles their ball back.
The first team to complete the drill is the winner.
Key takeaways:
There are many positives from this drill to take away.
One of the most evident ones is the joy it brings! But let’s also look at the learning part.
This practice instills the sense of competition and excitement of coming out victorious in your child.
From a sporting and technical point of view, it’s a great way to learn ball mastery through ball control. Sooner or later, they will experience rushed moments in a soccer game.
This drill will come in handy in such situations.
6. Shark and Minnows
I try to cover all possible game development areas in these specific drills and make the learning fun.
The next drill on the list is “Shark and Minnows.” An interesting and famous one, with loads of sporting benefits. This might be the most exciting drill on the list.
Let me show you how it works!
Requirements:
Following are the few protocols that you should require and follow while practicing this drill with a youth team:
- First and foremost, mark a rectangular area on the field where you practice. And divide that into three equal parts. You can also differentiate the three divisions with discs or cones to make it easier for the participants.
- Players can do this drill without the balls, but it’s more fun using a ball. So, you’re going to need multiple balls for this drill.
Step-By-Step Walkthrough of the Drill:

Step 1: Name the characters
We will be naming characters in this drill. First, two kids will be sharks, operating in the middle of the three divisions of a rectangular field. Then, around 6 or 8 kids will be Minnows, who will start the drill from either end of the marked area.
Step 2: Start the drill.
Here comes the fun part, the minnows will start from one end of the area. Their goal is to get to the other side without losing the ball.
The sharks, operating in the middle of the field, will try to steal the ball away and not let the minnows pass them with the ball.
Step 3: Minnows become sharks
Every time a minnow loses the ball to the shark, they become the shark and start trying to steal the ball away from the remaining minnows.
The winner will be the last minnow standing.
Key Takeaways:
A great drill for both offensive and defensive gameplay; this is the closest we get to real match situations in defensive and offensive terms.
The sharks deal with the defensive duties, and the minnows execute the offensive responsibilities.
This drill teaches ball composure and how to operate in tight spaces while leading the attack in real life.
At the same time, defensive development integrates with the attack.
7. The “Five Goals” Drill
This drill is perfect for helping kids to learn teamwork!
It involves holding a quick soccer game with slightly adapted rules to make it fun for the kids involved.
It will bring a lot of value to the kids, but make sure you conduct this match in a lighter mode, keeping in mind that we’re still dealing with young players.
This is also a great drill to teach kids about Youth Soccer Positions.
Here’s how it’s done!
Requirements:
- Define a rectangular area like a soccer field. Make sure to make it shorter or longer according to the kids’ skill level and age.
- Get two small goal nets and place them as goals, as on an actual pitch.
- Divide the kids into two teams.
- This drill involves only one ball.
Step-By-Step Walkthrough of the Drill:

Step 1: Define the area.
The drill will carry on like any soccer game, but there are a few changes. First, the teams can score in either of the two goal nets on the field.
Second, the reason why it’s called a ‘5 goal’ drill is that whichever team scores five goals first wins.
Step 2: Start the drill.
One team starts with a kick-off, the same way that every soccer game starts. Teams should work together to score a goal at either end of the field.
Step 3: Winning team scores five goals
This drill aims to score five goals first, but you can also set different scoring objectives. There are no hard and fast rules.
It all depends on the participants; if they are under 5’s, you can start with the aim of 3 goals also and move up from there gradually.
Check out the ideal soccer rules for kids in my article – Youth Soccer Rules (For every age group).
Key Takeaways:
The best part of this drill is that it teaches teamwork, and soccer is all about the team. But there are other factors too.
It deals with all the essential skills that any young player needs to develop because both teams are attacking and defending simultaneously.
- They’re shooting;
- They’re defending the ball,
- They’re passing,
- They’re dribbling in tight spaces;
You can see all these elements in the ‘5 goals’ drill.
It also brings kids closer to the pleasure of playing soccer as it is played and helps them experience the game feeling. This will make them love the game even more.
It will also increase their dedication to the game and training sessions.
In most scenarios, choose this practice at the end of the training day, so kids can implement what they’ve learned practically.
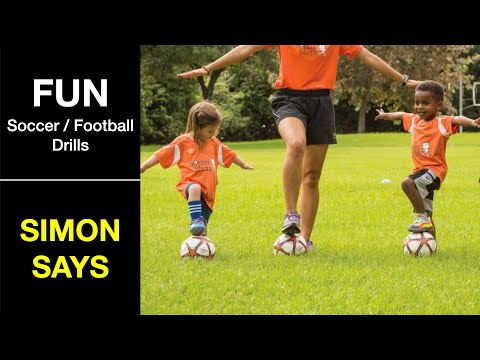
8. Simon Says
This drill is a popular one and is used in other sports, too.
It is the well-known game ‘Simon Says,’ In this context, we will deal with its soccer application.
In soccer or any other sport, following the coach’s command, carefully listening to the game plan, and executing it is important.
Because soccer is played more with the mind and the feet, this specific drill will teach your kid a lot about sticking to the game plan and following the coach’s instructions.
Here’s how:
Requirements:
- Like the drills before, you will need a marked area on the field, whether with cones or discs, whatever is suitable given the circumstances. Again keep the size of this marked area resonating with the age group of the participants. Larger for older ones, smaller for younger ones!
- Once you’ve marked it, you’ll need a ball for each player involved.
Step-By-Step Walkthrough of the Drill:
Step 1: Define the area.
Mark an area on the field that the players must stay within.
Give each player inside the marked area a ball.
Step 2: Start giving instructions.
Start giving instructions by saying, “Simon Says.”
These instructions can be anything like:
- “Simon says, “Perform a stepover,”
- “Simon says, “Move Around,”
- “Simon says, “Dribble left,”
- or “Simon says, “Dribble Right.”
There are no set criteria. These instructions can be subjective to the capabilities and skills of the kid performing.
Step 3: Watch the response
The fun part is yet to come.
The kids only have to follow the instructions when the coach says the slang ‘Simon Says.’
Try to trick kids by not saying “Simon Says” before the set of instructions.
Whenever someone fails to follow the coach’s instructions, they leave the game. The last kid standing wins the drill.
Key Takeaways:
As we emphasized before on following the coach’s words and game plan, this drill will make your kid a good listener and executor of the instructions.
This will significantly help the participant in a real game environment.
Other positives include improved dribbling capabilities and improved ball control.
9. The “Dribble-Sprint-Dribble” Drill
Staying fit or getting in shape for soccer is critical for any player, including kids.
When players’ fitness levels are higher, they perform better in every area of the soccer field and enjoy the game more.
A youth soccer coach should focus on their player’s fitness but be careful to keep the drills fun! This is why I also included this drill in my list of the 10 Best Soccer Coaching Drills.
During a game, players perform multiple short sprints. Their fitness training should reflect this.
Requirements
The equipment needed for this drill is fairly straightforward.
- A ball,
- three cones, or a soccer field.
Step-By-Step Walkthrough of the Drill:

Step 1 – Positioning the players.
For this drill, youth players start on the sideline of the soccer field. They should have the ball at their feet.
If you don’t have access to a soccer field, any field or flat surface around 50 yards wide will do for this drill.
Just use two cones to mark the spots 50 yards from each other and then one more cone at the halfway point between the two.
Step 2 – Run halfway.
Have the players dribble as fast as they can toward the halfway point of the field.
They should then leave the ball and sprint as fast as they can to the opposite touchline.
Step 3 – Touch, turn and run.
At the 2nd touchline, the players should touch the line with their hand. After this, they should turn around quickly and sprint back to where they left the ball.
Step 4 – Dribble back.
When they return to the ball, the player should dribble back to where they started as quickly as possible.
Step 5 – Rest and repeat
When back at the start, allow the players 1 minute to catch their breath and then repeat the drill.
Do this five times in a row or as many times as you feel is appropriate for the kids you’re working with.
As a player’s fitness improves, you may wish to repeat the drill consecutively more than five times in one go.
Key Takeaways
This specific drill aims to increase kids’ anaerobic fitness.
In a soccer game, players mostly use anaerobic energy rather than aerobic. I’ve discussed this difference in my articles about long-distance running for soccer players and cycling for soccer players.
The beauty of working on this area of a player’s game is that it should improve every area of their performance on the field.
A player’s fitness levels determine how long they can keep playing, how quick they are to the ball, and how effective they are with the ball.
Kids will love doing the work as long as it’s fun for them.
It’s the secret ingredient for keeping your child involved and engaged in soccer on their way to becoming a professional athlete one day.
If you focus, all these drills involve skill development in all the crucial areas of soccer. That’s called being productive while enjoying your time!
For more helpful soccer info, check out one of my previous articles:
- How to Juggle a Soccer Ball in 10 Easy Steps
- 10 Soccer Attacking Drills to Increase Your Team’s Chances of Winning
- The 10 Best Soccer Drills for Beginners
- Youth Soccer Field Size and Dimensions
Recent Posts
In soccer, few playing styles have garnered as much admiration and acclaim as "Tiki-Taka." This mesmerizing and intricate approach to the beautiful game has redefined soccer and left an...
In the world of soccer, where every position plays a crucial role in shaping the outcome of a game, the sweeper is a fascinating and often misunderstood position. The term "sweeper" evokes images...